October 14, 2025
Written by
Becca Levian
If you’re a parent, you know how quickly the artwork piles up.
The finger paintings. The rainbow scribbles. The paper plate creations. The tiny people with giant heads. The “I made this for you” pieces that immediately make you feel like you are legally and emotionally required to keep them forever.
And honestly, a lot of it does feel impossible to throw away.
Because it’s not just paper.
It’s a season. Their handwriting. Their imagination. Their little hands. The way they saw the world at that exact age.
But also? Keeping every single piece in a bin forever isn’t exactly the dream either.
So the question becomes: what do you actually do with all of it?
After making a few kids’ art canvases with our own children, I’ve realized there are really three different ways to turn their artwork into something you can display, enjoy, and keep — depending on how hands-on you want to be.
This is the version we started with.
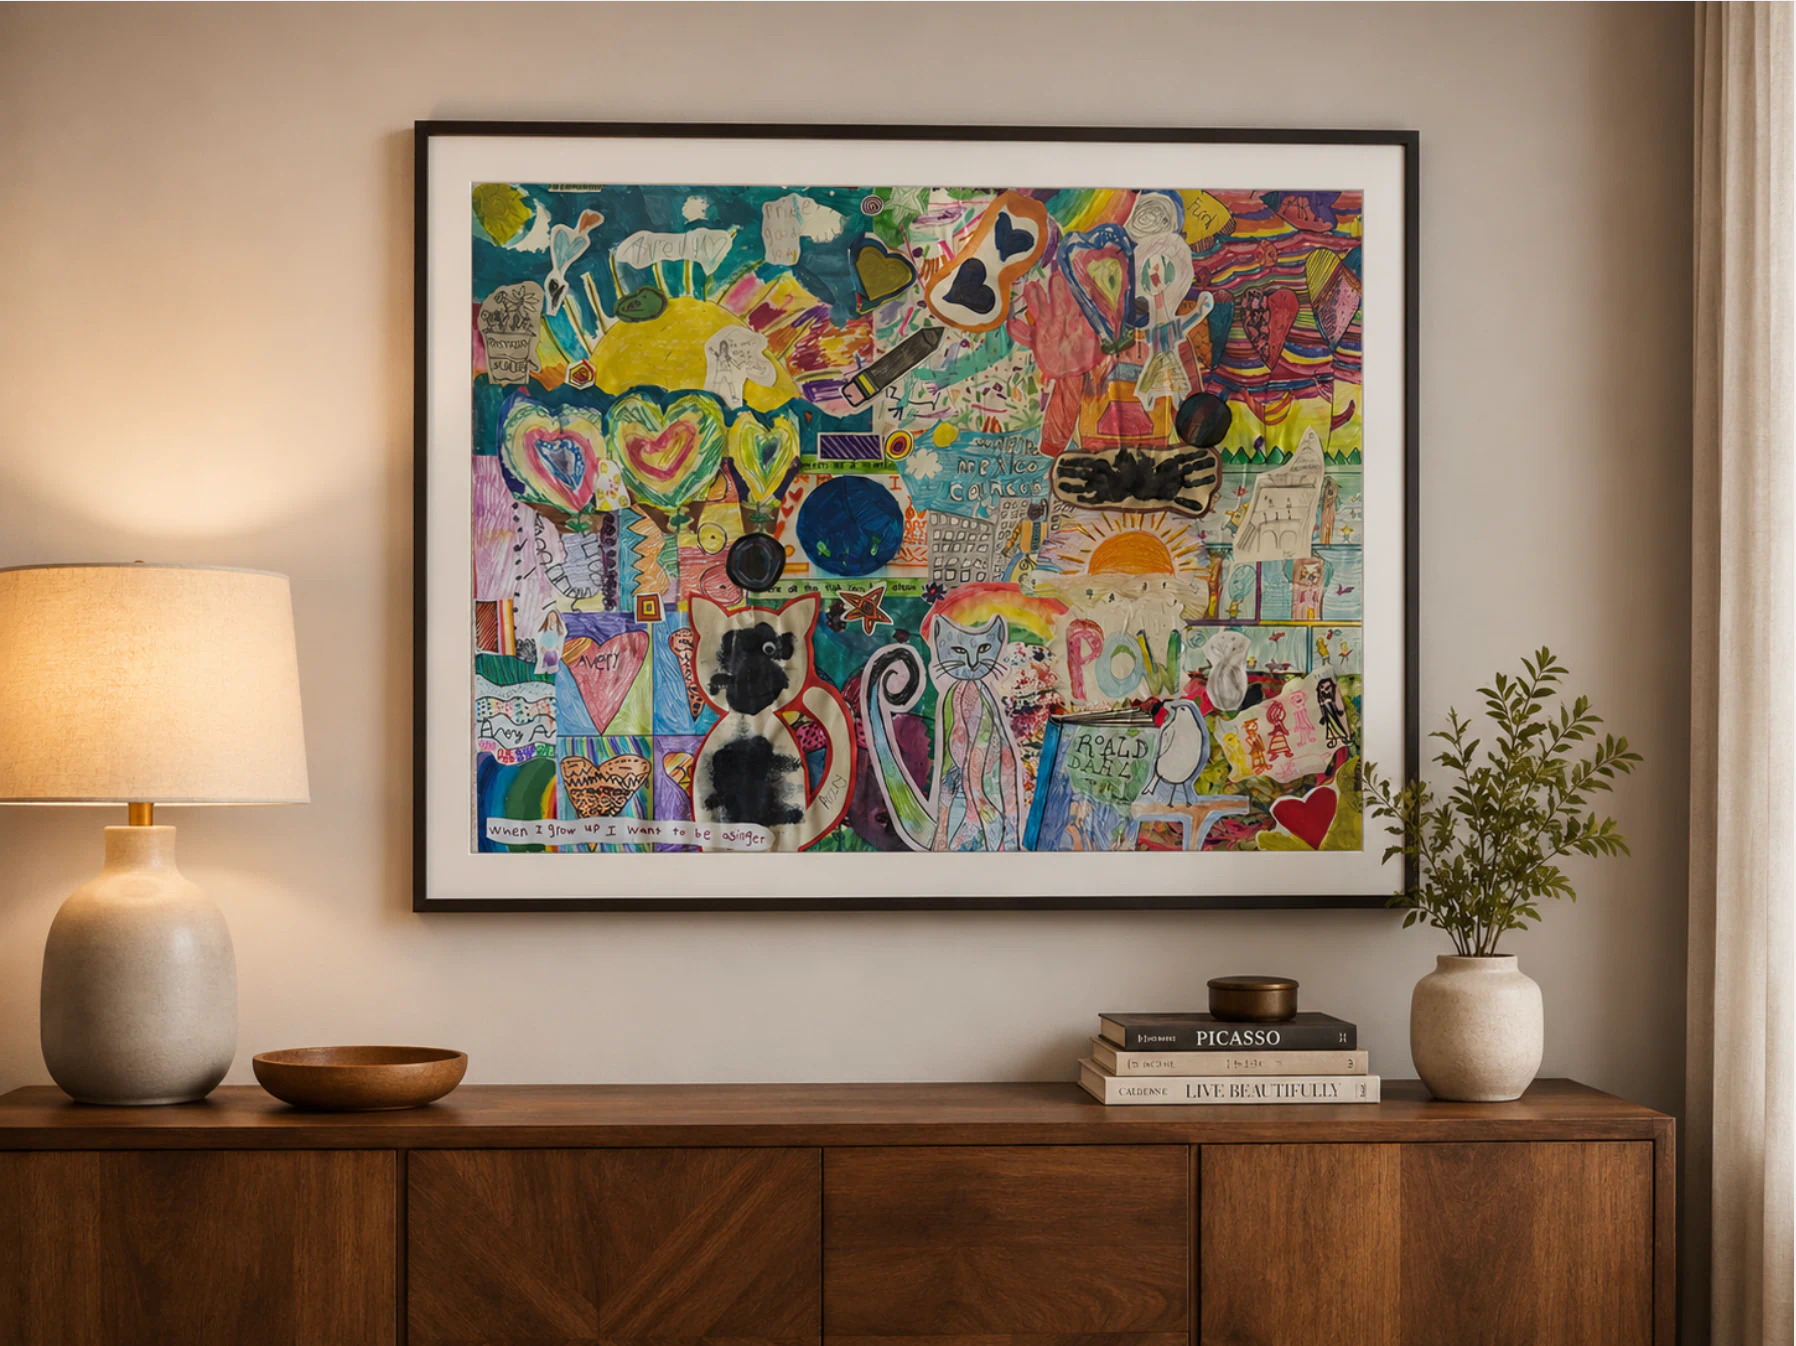
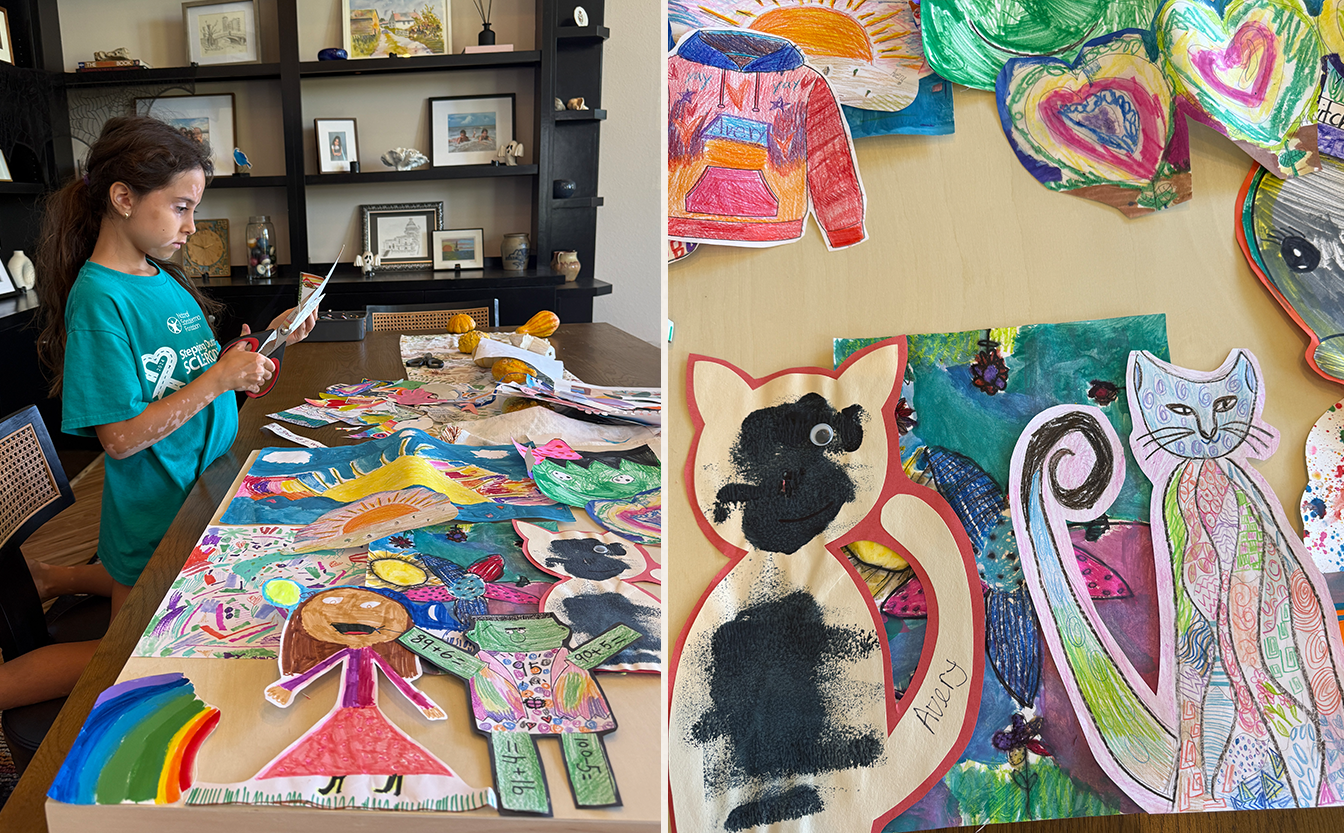
You gather the artwork, choose your favorite pieces, cut them down, arrange them on a large canvas, and use Mod Podge to glue and seal everything into one big layered collage.
It’s messy, colorful, emotional, and really special.
There’s something very meaningful about physically working with the art. You’re touching the paper, seeing all the little details again, remembering when they made certain pieces, and slowly turning a giant pile into one finished piece.
This is a great option if you want the experience of making it yourself.
All of these supplies are on our Amazon Art Project List — the same ones we used for this canvas.
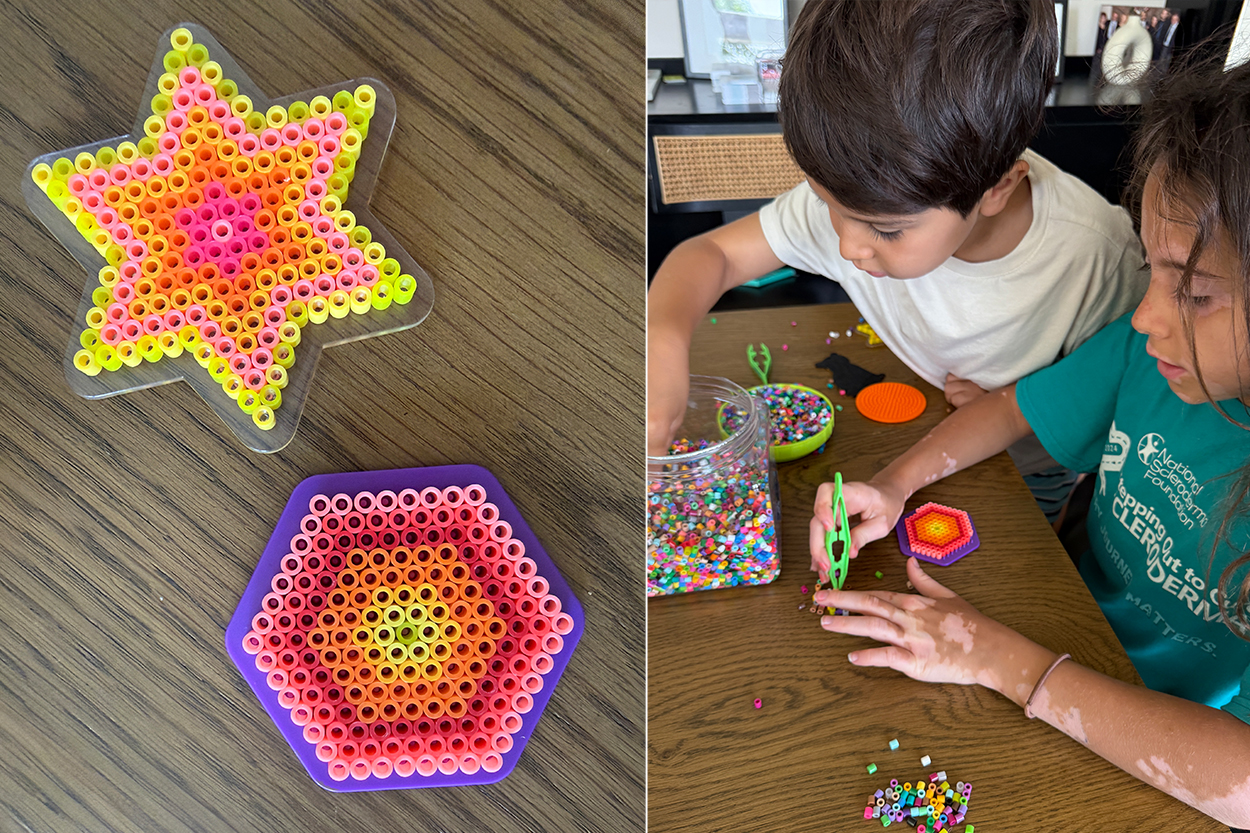
Materials:
This method is beautiful, but it is also permanent.
You will be cutting the artwork. You will be gluing it. Some pieces may wrinkle. Some markers or paints may bleed a little when they touch the Mod Podge. Thicker pieces may be harder to attach. And once it’s on the canvas, you can’t exactly undo it.
That doesn’t mean you shouldn’t do it. It just means you may want to be thoughtful about what you use.
I usually recommend taking photos of the artwork before cutting anything, and saving the extra-sentimental pieces until you feel more comfortable.
This option is best if you want something handmade, textured, personal, and truly one-of-a-kind.
And if you want someone to walk you through the process, I created a simple step-by-step video tutorial that shows you how to choose the art, plan the layout, layer, glue, and finish your canvas without feeling totally overwhelmed.

This is the best option if you love the idea of a keepsake collage, but you don’t want to cut, glue, or risk damaging the original artwork.
For this version, you can send the pieces to me, and I’ll digitally create the collage for you.
That means I can arrange the artwork into a finished composition, clean up the layout, balance the colors, resize pieces, and create something polished while still keeping all the charm and personality of your child’s original art.
Then, once the digital collage is complete, you have options for how you want it printed.
You could print it as:
The biggest benefit here is that you don’t ruin the original art.
You can keep the actual pieces, but still turn them into something beautiful and display-worthy.
This option is great if you want the finished look of a collage, but don’t want to figure out the layout yourself — or if the thought of cutting your child’s art makes you immediately break into a light stress sweat.
It also gives you more flexibility. We can create something large and statement-making, or something smaller and more minimal. You can print it once, print it multiple times, or save the digital file for future use.
If you’re interested in having us create a custom digital collage using your child’s artwork, reach out here:
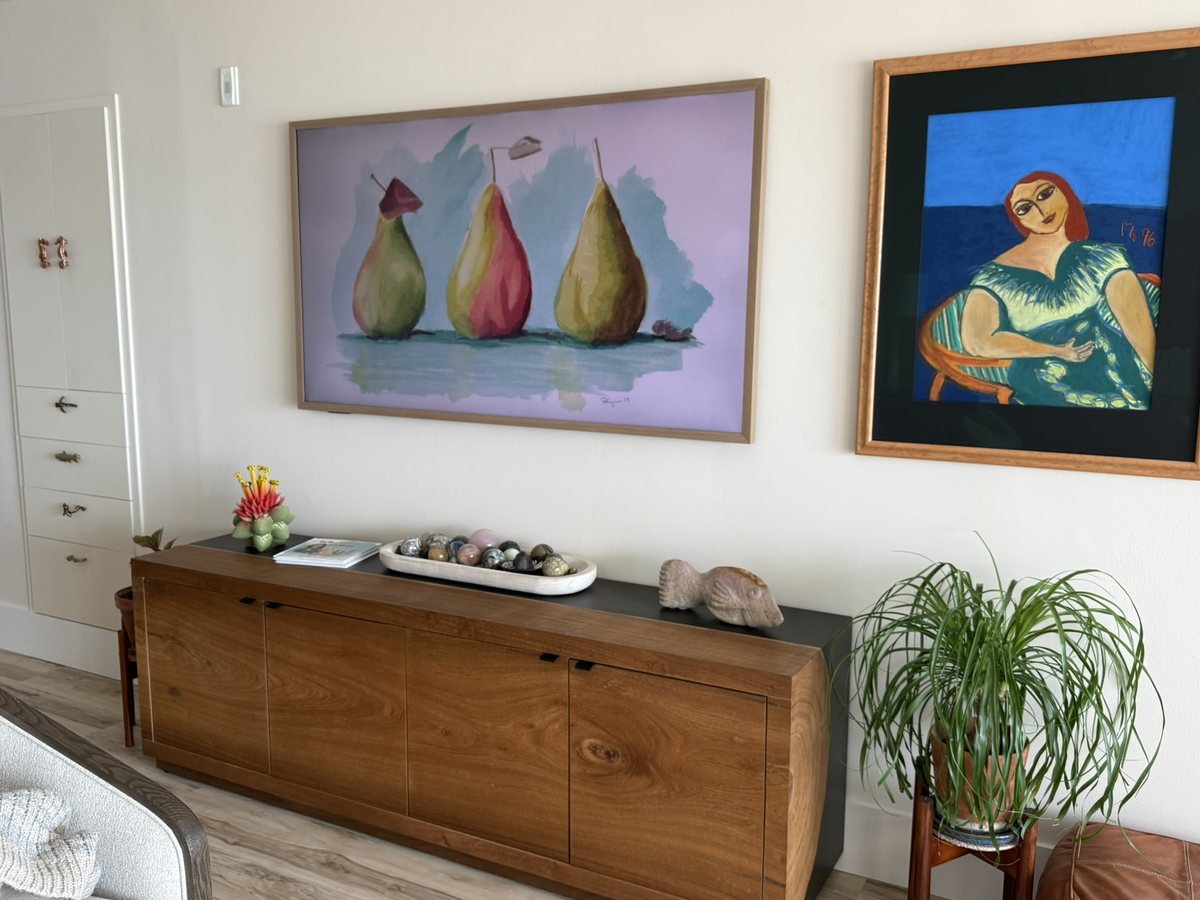
Instead of creating a physical canvas or printed collage, you can resize your child’s artwork so it fits beautifully on a digital screen — like a TV display.
This works especially well if you have a frame-style TV or a screen you already use to display art. This is the one we have and recommend.
You can photograph or scan the artwork, crop and resize the images, and then create a rotating digital gallery right in your home.
It’s such a sweet way to showcase more of their artwork without needing to print, frame, glue, or store everything.
This option is great if you:
You could create a little gallery for each child, rotate artwork by age or school year, or even make seasonal collections.
Think: winter paintings in December, colorful flowers in spring, all the wild rainbow pieces when your house needs a little joy.
You can learn more about displaying art on your TV here:
Honestly, it depends on what you want.
If you want the hands-on, sentimental, messy-but-beautiful experience, make the physical canvas yourself.
If you want a polished collage without risking the original artwork, have it digitally created and printed.
If you want something simple, flexible, and easy to update, create a digital display.
There’s no wrong way to do it.
The real point is to stop letting all those little pieces sit unseen in bins and drawers forever. Because when we display our kids’ art, we’re telling them their creativity matters. Not just the perfect pieces. Not just the ones that look like something recognizable. Not just the ones that match the house.
All of it is part of who they are.
And whether you turn it into a handmade canvas, a digital collage, or a rotating screen display, you’re giving those little pieces of their childhood a place to live.
Shop our favorite art supplies and project picks in our Amazon Storefront.
.png)
Sign up below to access our step-by-step video tutorial showing you how to turn your child's artwork into a beautiful canvas for your home.